

THIS IS IT! I’m so excited to finally share our One Room Challenge kitchen project with all of you after so many months of planning and hard work! This project was a true DIY undertaking through and through. Like everything else we’ve done to our home, I dreamed it up and Derek helped me make it happen. So first and foremost, THANK YOU to Derek – honestly, I couldn’t ask for a better partner in crime. Thanks for not only putting up with, but always encouraging all of my wild ideas. I couldn’t do any of this without you.
I’d also like to give a big thanks to Linda Weinstein and Better Homes and Gardens for hosting this incredible event despite all of the craziness 2020 has brought thus far. It’s been a nice distraction to say the least! It’s also been a great opportunity to meet new friends and inspire each other. If you haven’t yet, make sure to go check out all of the other reveals that’ve happened over the past week. So many dreamy transformations, I can’t even! Finally, I want to give a shoutout to all of my awesome sponsors (Hudson Valley Lighting, Mitzi Lighting, Formica, Samsung, TIPTOE, and Winnoby) for helping me pull this off. Thanks again!


So let’s revisit the plan, shall we? I’ve mentioned before that Derek and I bought our house as a foreclosure with the intention to flip it. It was a gut reno that seemed like an insurmountable task at the time, so we tried to do everything as easily and affordably as possible. It wasn’t so much about designing my dream home at the time, but getting ‘er done. However, after five years of living here, there were several things that I wished I’d done differently both aesthetically and functionally. The main things I wanted to address were: the wooden countertop, which wasn’t holding up well; the cheapo cabinet doors, which also weren’t holding up well; the kitchen faucet and cabinet pulls, which were chipping; the lack of architectural detail; and the whole entire main area of the house feeling a bit too open.


I partnered with Formica to replace the wooden countertops with their Blanco Terrazzo Solid Surfacing countertops, which we fabricated and installed during Week Six. Honestly, I couldn’t be happier with them! They’re basically bullet proof and if they ever happen to get damaged somehow, they’re repairable too. How cool is that? Terrazzo is so trendy right now and Formica’s Solid Surfacing is a more affordable alternative to the real deal. I can’t recommend them enough!


Since we replaced the countertop, we also took the opportunity to reconfigure the cabinets to make the oven and microwave less noticeable from the living room. I worked with Samsung to replace the wall microwave and oven unit we had previously with a more low profile range and microwave that we hid in one of the lower cabinets.


While we were at it, we also made new cabinet doors AND hardware ourselves, enclosed the sides of the island and cabinets to give it a more custom look, and built a fluted range hood. A few other DIYs I did for this project: the fiber art in the dining room, the penny tile under the island, the fluted dining table, and the waterfall ottoman.


In addition to the DIY projects we did to change the look of the kitchen, I also worked with Hudson Valley Lighting and Mitzi to replace the flush mount over the sink and the pendants over the island. Over the sink, I used HVL’s Aragon flush mount. The detail on the base and the alabaster shade make it a real show stopper. For over the island, I chose Mitzi’s Asime pendants. I wanted something that wouldn’t command as much attention as what I had there before. I also used HVL’s Flare floor lamp in the living room. Between the shape of the shade, the brass detailing, and the wrapped base – I just couldn’t pass it up!


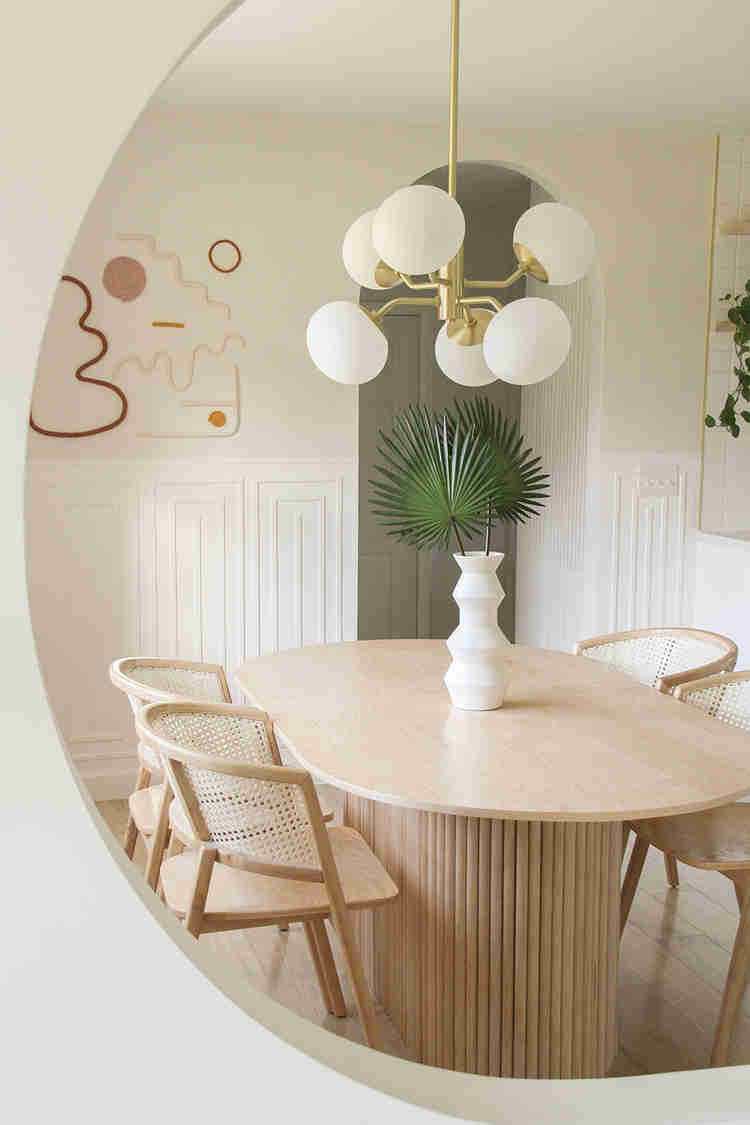


That brings us to the biggest change (and challenge) of all: the gigantic keyhole archway and two half circle archways we built to add to the architectural interest and separate the kitchen and dining from the living room while still leaving it feeling relatively open. I saved this part of the project for last because drywall work is quite possibly THE WORST thing ever, which almost made me miss the posting deadline, but I pulled it off and I couldn’t be happier with how it turned out!


And that’s it y’all! Thanks so much for reading! I’m dying to know what you think, so drop a comment below for me pretty please!
Then, if you haven’t already, go take a gander at all of the other guest blogger’s reveals here and the featured designer’s reveals here. You can also check out everything Derek and I have done to get to this point here:
Week One | Week Two | Week Three | Week Four | Week 6 | Week 7
Again, a HUGE thanks to my sponsors for this event: Hudson Valley Lighting, Mitzi Lighting, Formica, Samsung, TIPTOE, and Winnoby. As always, all thoughts and opinions are my own.
Post from: Britdotdesign.com