

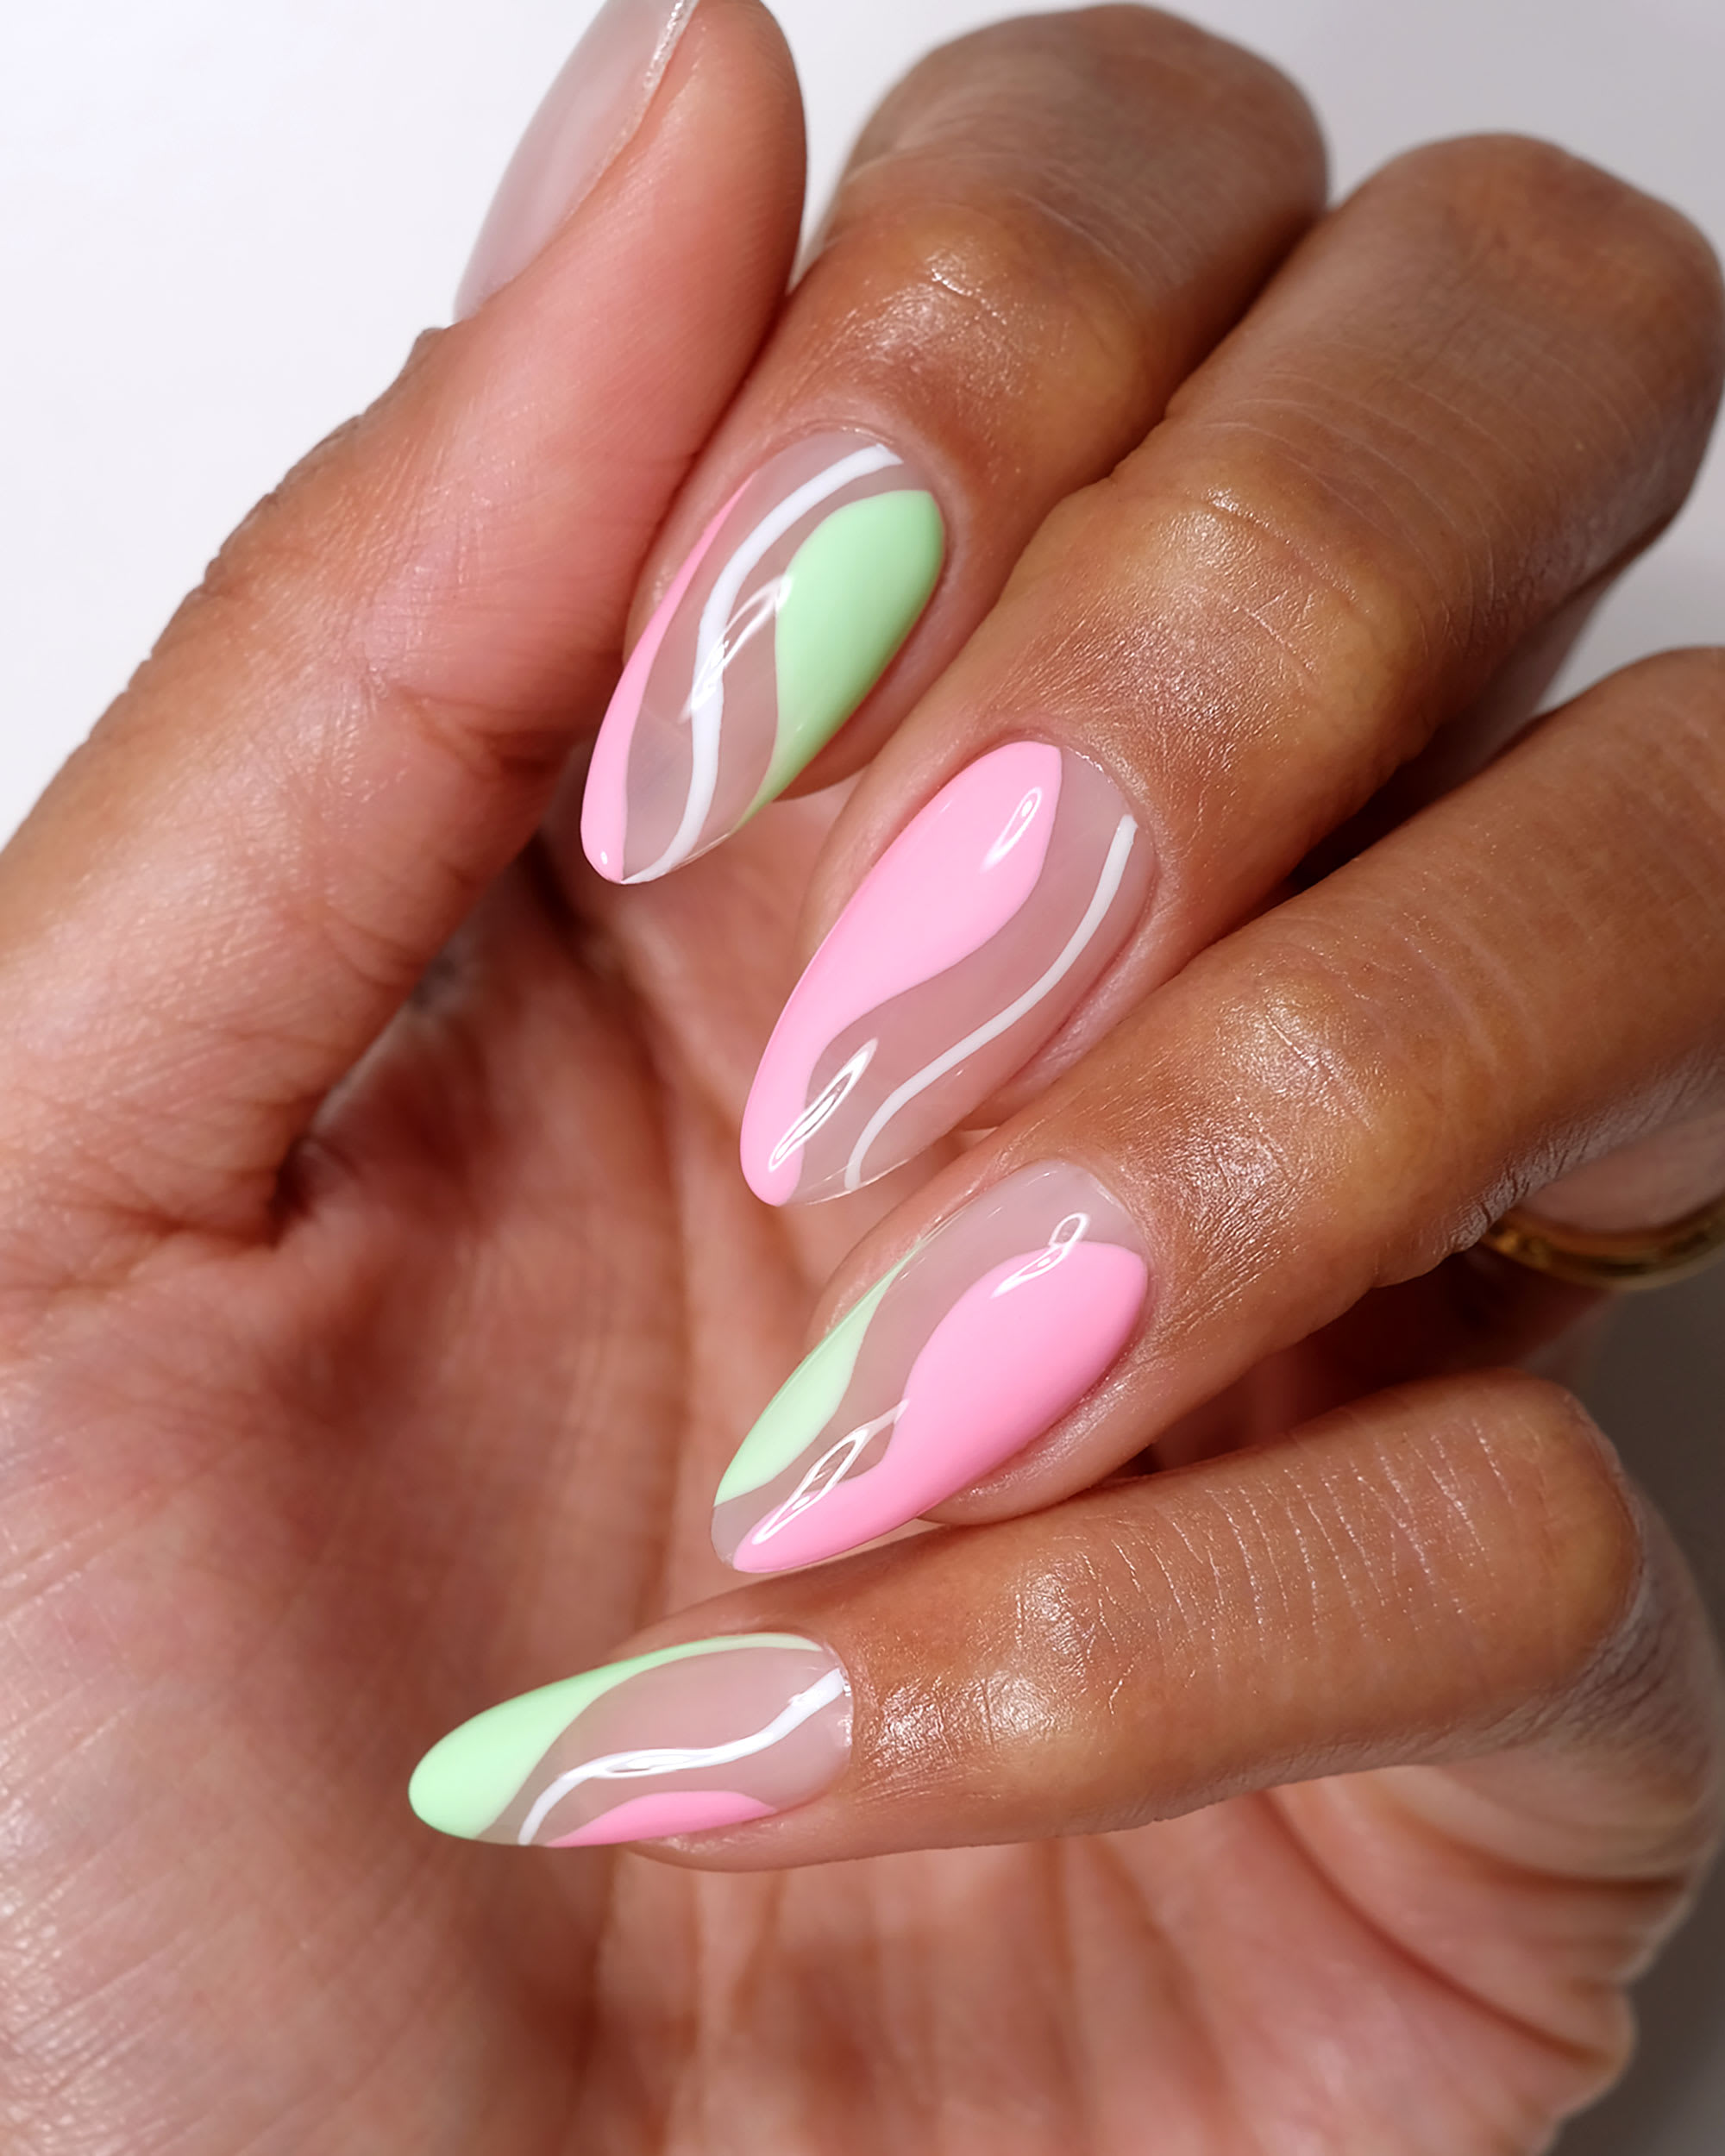
With warm weather finally, here, it’s time to embrace brighter nail shades and celebrate the sunnier days ahead. And what better way to welcome the freshness of spring and the vibrancy of summer than with trending pink and green nails? This cheerful color combination is perfect for adding a pop of color to your look. To take it up a notch, we’ll incorporate playful abstract swirls that truly capture the essence of this transitional season.
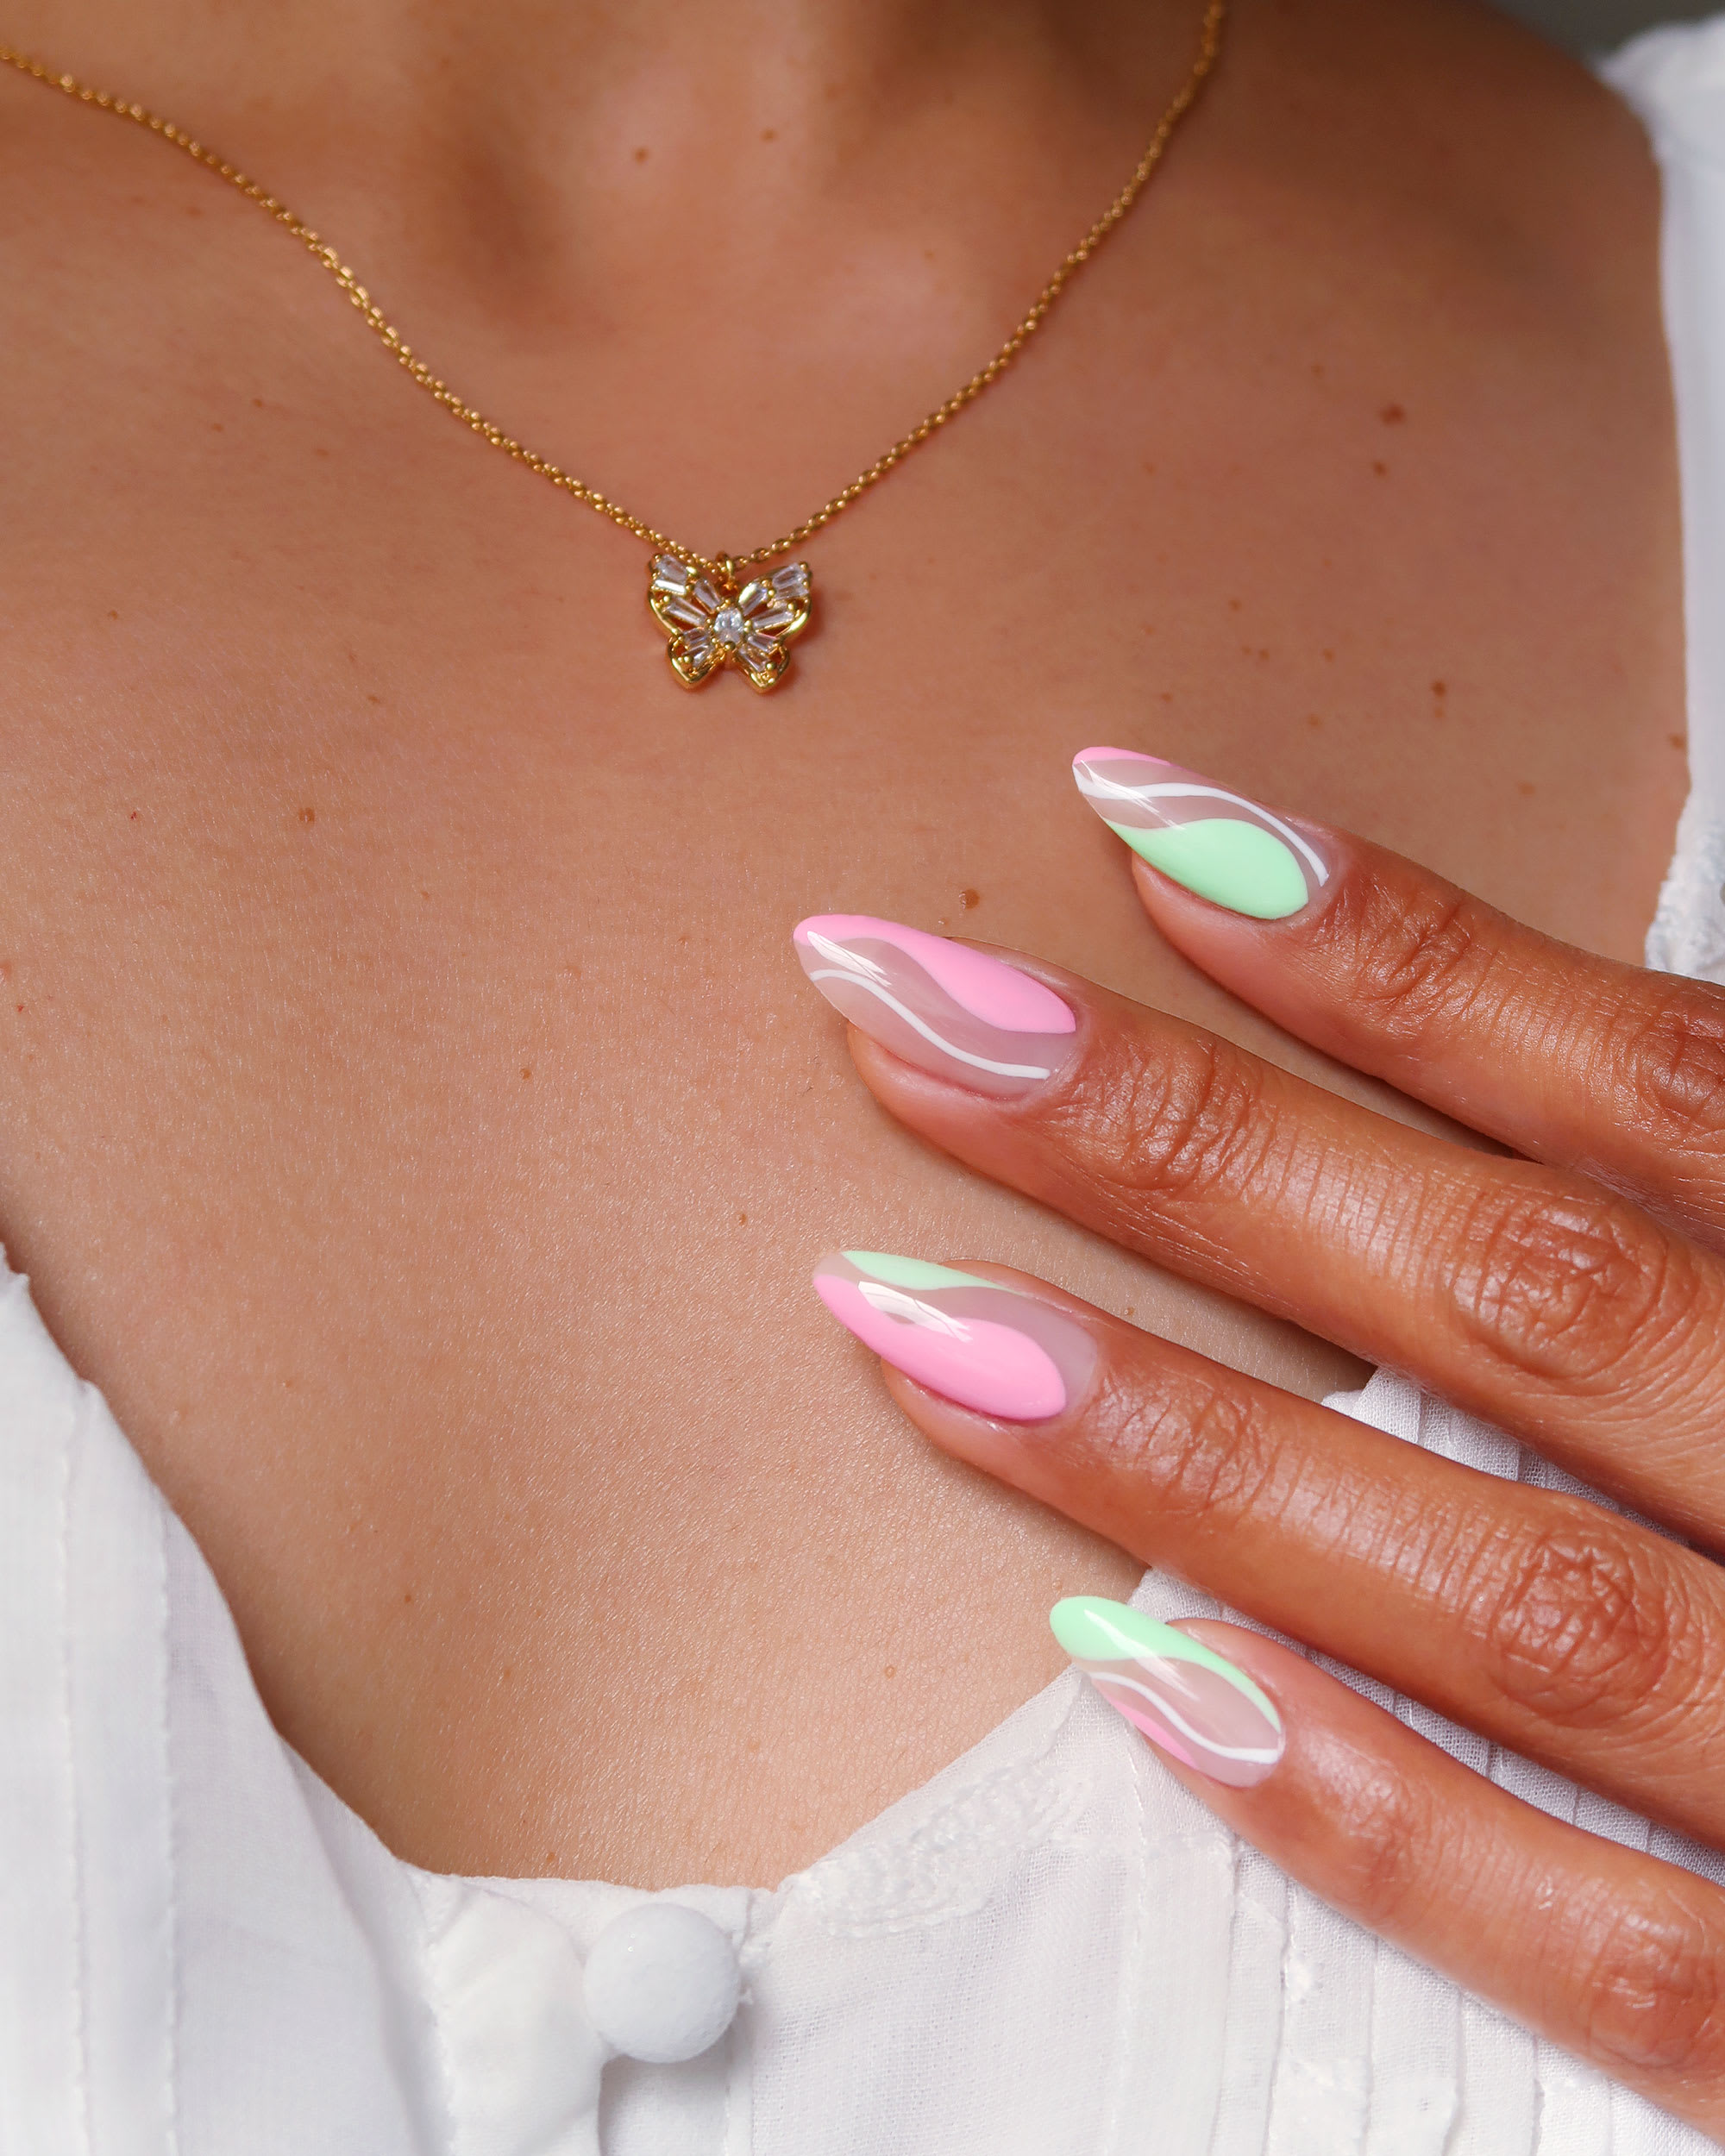
Whether you’re planning a picnic or hitting the beach, a green and pink nail design is sure to make a punchy statement and elevate any outfit. Here’s how you can recreate this nail art yourself:
Supplies:
- Gel base coat
- Neutral gel nail polish for the base
- Bright green gel nail polish
- Bright pink gel nail polish
- White gel nail polish
- Thin nail art liner brush
- Gel top coat
- Gel lamp (for curing)
Instructions:
- Nail prep is a critical first step to ensure a clean base for your design and a long-lasting manicure. Take the time to clean up any dry skin from the nail beds, push back the cuticles and lastly, wipe the nail plate clean of residue and oils so the gel will adhere properly.
- Apply a thin layer of base coat and cure.
- Apply 2-3 coats of neutral gel polish on each nail and cure.
- Next, place some of the green, pink, and white gel polish on your palette, and grab your thin liner brush. This design is easy to alter and personalize as the shapes are abstract and vary on each nail, but in my design, I alternated colors, lines, and shapes on each nail for a fun variety.
- On the pointer finger, take some green polish on your liner brush and create a swirling line from the bottom of the nail, tapering towards the top of the nail. Fill in this shape with the green polish.
- Now, take some white polish on your liner brush, and starting slightly to the right of your initial shape, create a thin swirling line upwards until you reach the tip of your nail. Refine the shape as needed, using a clean-up brush and acetone to fix the swirl.
- Taking some pink gel polish on your liner brush, create a slightly swooping line from the right middle corner of the nail towards the tip. Fill in this shape with the pink polish.
- Cure each nail as you finish the design.
- Continue this similar pattern on each nail, but alternate the shape placements, the shape colors, and the white swirl as you go. Switching up the design on each nail gives it a fun mix-and-match look.
- Apply a gel top coat and cure.
- Finish with cuticle oil!
Did you try this watermelon-inspired mani? our Summer Fashion Shop for more delicious styles!
Melanie Graves is a self-taught nail art enthusiast who creates colorful, easy DIY designs for fellow home manicurists.
Repost from Lulusblog.com
For more Posts click here